How should the manual test be done? How much detail do we need in the EL photo? If we take the photos in such a way that we can see what details we can see, we can see if it is in line with the guidelines for quality in panel production.
The EL test journey has also brought with it many trials, errors and learning processes.
To make EL photos, you first need to learn what EL is. EL is not just a photo that you can take with a piece of equipment; you have to turn the solar panel into an electroluminescence (EL) source. In other words, you energize the solar panel and turn it into a UFO heater. “What do you mean?”, I hear you ask. Yes, we light the solar panel as a lamp to take this photo.
Since the photo is a long exposure, you apply this voltage for about 10 seconds so the panel is unaffected, but if you apply it for a long time during the test phase, you will burn the panel. Don’t try it yourself at home 🙂
After thoroughly familiarizing ourselves with the technology, we set up our own small test station and started our first tests.
Although this EL photo wasn’t sharp and didn’t have enough pixel detail, it was an indication that we were on the right track. We immediately went to the field and did our first test.
One evening we conducted our first field tests on the premises of a company where we regularly perform O&M processes. The goal here was to drop files to the cloud using RaspberryPi and process them there.
At this stage, the communication and machine learning technologies were ready to go. The infrastructure was there, but the images were not of high enough quality. So how do we define quality? How high quality should EL photography be?
We took as a yardstick for comparison the records of a factory capable of producing high-level EL photographs.
Our goal was to capture at least this quality of image in the field. For this reason, a serious sensor/target hunt began for us. Which sensor should we use with which settings? Which feature of which lens should we use? What filters were needed, we set out on a very long journey. I looked for the next step in every EL photo I took and I think I got to that stage at some point. But the solution wasn’t just hardware based.
In addition to the hardware EL solutions available on the market, it also requires post-processing to see the required values in the photo, so it’s as much a hardware problem as a software problem.
So where do we start from? Good question. See below the first and last photo of the same panel.
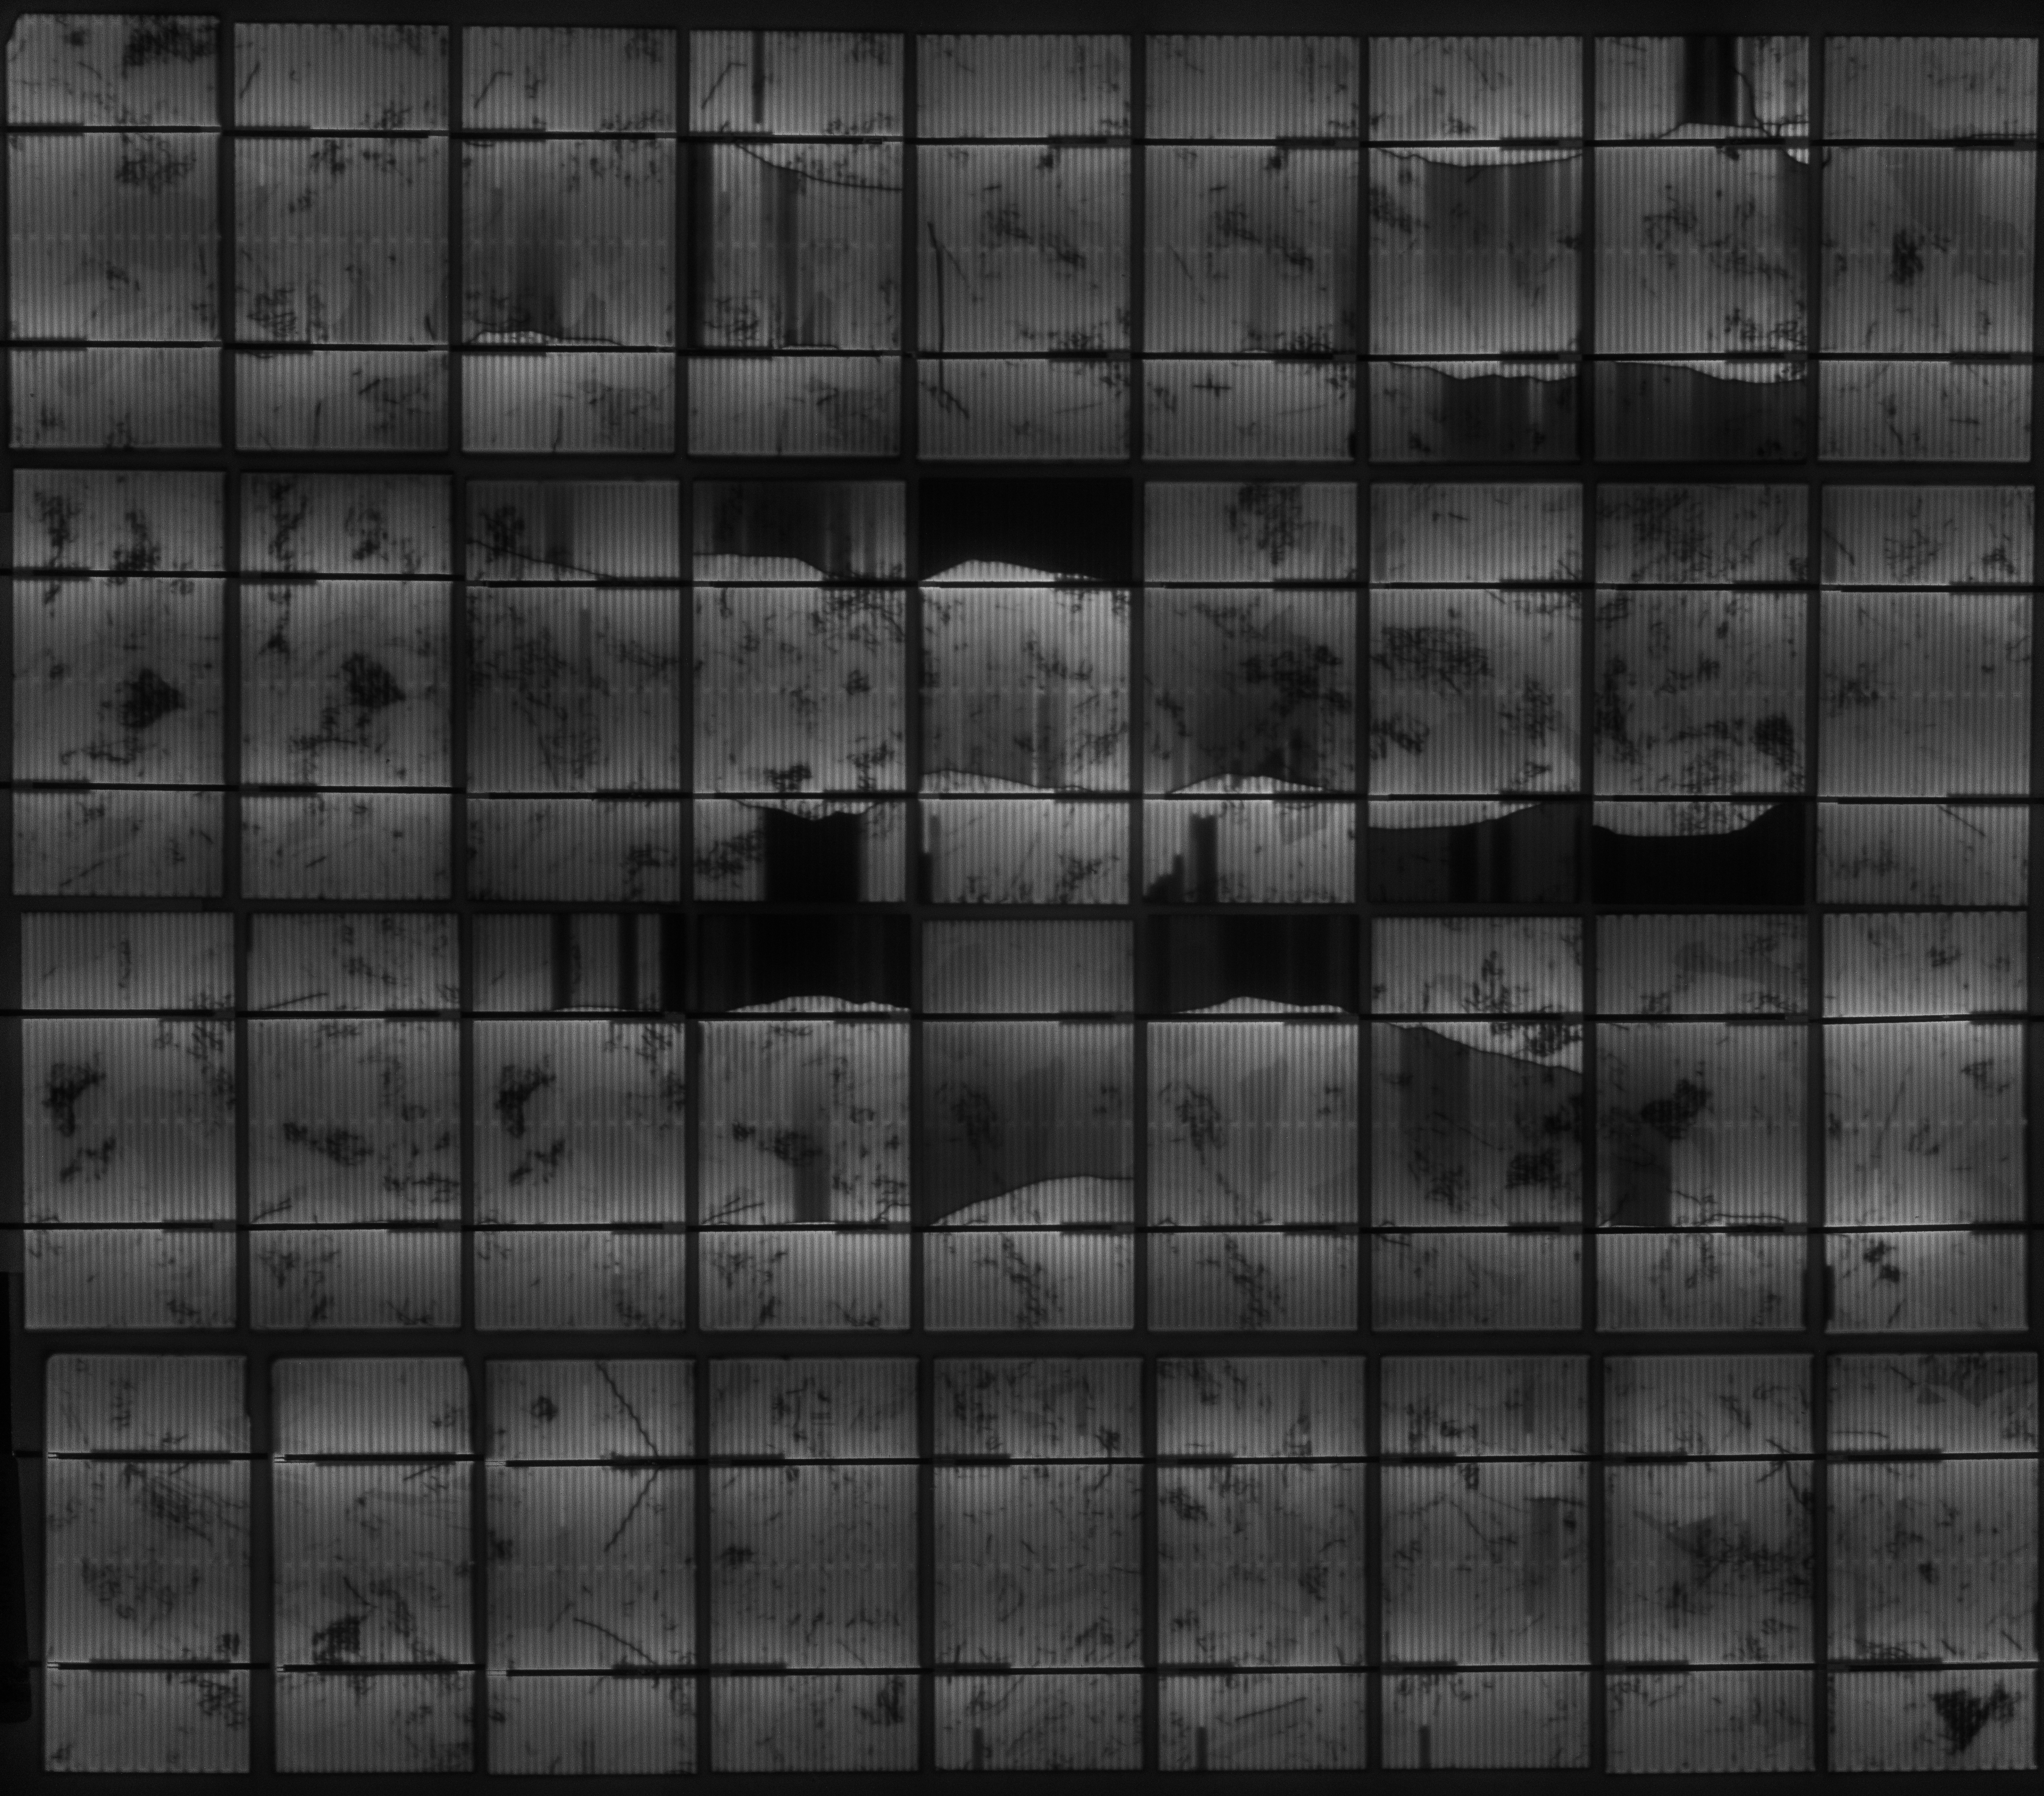
Isn’t the difference enormous? At the point where we are today, there is some very serious optical quality and software optimization. We have a photographic technique that allows us to see even the finest details on the cell.
On top of that, our Raspberry device in the system can receive this data and send it to the cloud; a python code in the cloud analyzes and interprets it. Today, we’ve developed the device you see above, we’ve written the code to manipulate the photos, and we’re developing applications in the cloud. Maybe 5 years ago, these were dreams. Where does the technology come from?
Don’t damage the panel while mounting the panel. All will be revealed if we get to the EL test 🙂
You can fill in the form below to get information about our EL tests.